When I was first starting out in IT, I had to get Compaq and IBM laptop certifications so I could RMA parts to repair the mountain of systems on my desk. I lost so many screws it isn’t even funny. I always loved the old late 90s IBM laptops for their durability and form factor. And they’ve always had great Linux support.
The x220 is one of the last of it’s kind. I bought one off eBay for 200 bucks, but the damn thing had Intel Management Engine and Computrace backdoors installed and couldn’t be disabled no matter how many times I called Absolute Software, flashed custom bios, or loaded up WinPE in the hopes that it would checkin and disable.
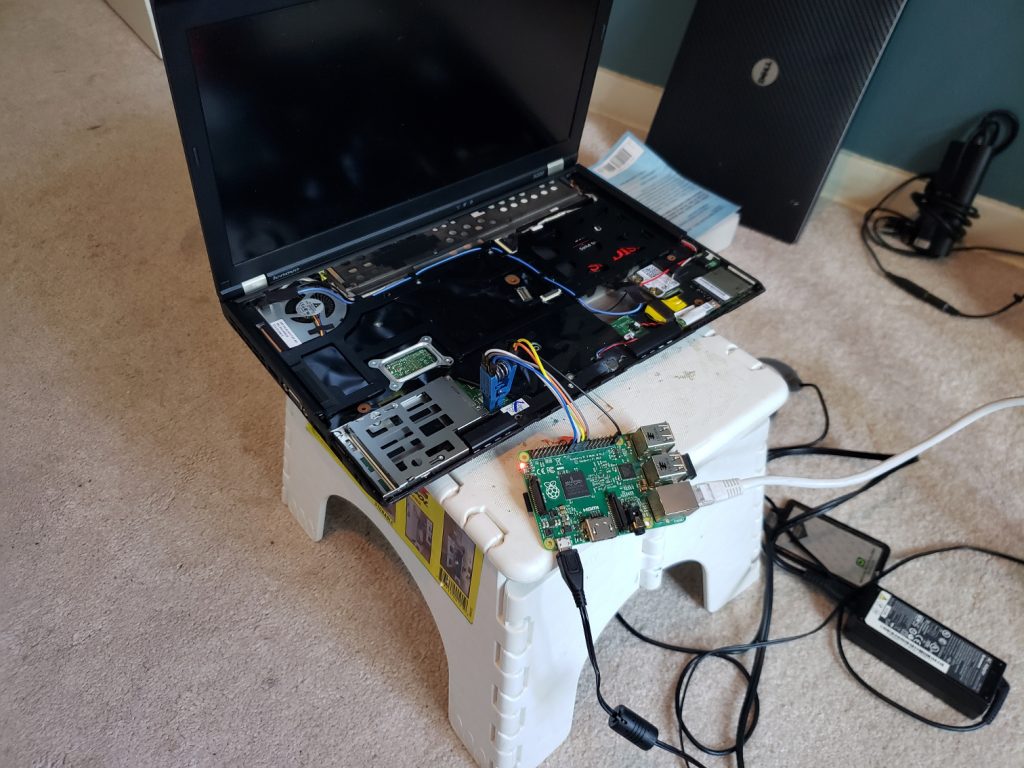
I wanted to get rid of Computrace as well as Intel ME and gain some freedom. Coreboot is a great option and I have plenty of raspberry pi 3Bs and breadboard parts laying around. I just needed a Pomoa clip.
Here’s how I flashed Coreboot onto my x220.
Make sure you’re listening to some techno, grab a copy of raspian lite from here, and write it to the sd card.
dd bs=4M if=rasbian-lite.img of=/dev/sdX
Attach the network cable, a monitor, or just a keyboard. Boot and enable ssh.
systemctl enable ssh && systemctl start ssh
Ssh in and install prereqs.
sudo apt-get update -y && sudo apt-get dist-upgrade -y && sudo reboot
sudo apt-get install build-essential pciutils usbutils libpci-dev libusb-dev libusb-1.0 libftdi1 libftdi-dev zlib1g-dev libncurses5-dev libncursesw5-dev gnat flex bison wget -y
git clone https://github.com/flashrom/flashrom.git
cd flashrom
make
sudo make install
Load the modules.
sudo modprobe spi_bcm2835
sudo modprobe spidev

#Add them to /etc/modules-load.d/modules.conf
Enable SPI
sudo vi /boot/config.txt
Remove the comment from:
#dtparam=spi=on
Reboot and make sure the modules load.
lsmod | grep spi
poweroff #and unplug
Remove the keyboard and palmrest. Set the battery and power brick aside. Make sure you save all the screws 😉
Pamona clip pinout:
--------------Screen-------------
MOSI 5 white --| |-- 4 GND black
CLK 6  green --| |-- 3 N/C
N/C 7        --| |-- 2 MISO yellow
VCC 8  blue  --|_|-- 1 CS orange
---------------You---------------
RPI pinout:
-----------------------------------------Edge of pi (furthest from you)-------------------------------------
                                                              CS orange
                                                               |
   +--------------------------------------------------------------------------------------------------------+
   |    x    x    x    x    x    x    x    x    x    x    x    x    x    x    x    x    x    x    x    x    |
   |    x    x    x    x    x    x    x    x    x    x    x    x    x    x    x    x    x    x    x    x    |
   +--------------------------------------------^----^----^----^---------------------------------------^----+
                                                |    |    |    |                                       |
                                               3.3V  MOSI MISO |                                      GND black
                                             (VCC) white yellow CLK
                                              blue             green
-----------------------------------------Front of Pi (closest to you)----------------------------------------
For more information on SPI, see this.
Attach the clip to the rom chip next to the ExpressCard slot. You’ll have to peel back the corner of the keyboard adhesive. Boot the pi and see if you can read from the chip.
sudo flashrom -p linux_spi:dev=/dev/spidev0.0,spispeed=512
Backup the rom several times. Takes a few minutes each run.
cd
sudo flashrom -p linux_spi:dev=/dev/spidev0.0,spispeed=512 -r flash01.bin
sudo flashrom -p linux_spi:dev=/dev/spidev0.0,spispeed=512 -r flash02.bin
sudo flashrom -p linux_spi:dev=/dev/spidev0.0,spispeed=512 -r flash03.bin
md5sum the files and make sure they all match. Should all be 8 meg. If they don’t match up, try harder.
md5sum flash01.bin flash02.bin
md5sum flash01.bin flash03.bin
Pull down coreboot and install ifdtool. Extract the descriptor, Intel ME and gigabit ethernet modules from your saved flash. This will take around 10 minutes.
cd
git clone http://review.coreboot.org/coreboot.git ~/coreboot
cd coreboot
git submodule update --init --recursive
cd 3rdparty
git clone http://review.coreboot.org/p/blobs.git
cd ../util/ifdtool
make
sudo make install
cd
ifdtool -x flash01.bin
mkdir -p coreboot/3rdparty/blobs/mainboard/lenovo/x220
cd coreboot/3rdparty/blobs/mainboard/lenovo/x220
mv ~/flashregion_0_flashdescriptor.bin descriptor.bin
mv ~/flashregion_2_intel_me.bin me.bin
mv ~/flashregion_3_gbe.bin gbe.bin
Definitely want to get rid of that MEI shit.
cd
git clone https://github.com/corna/me_cleaner
cd me_cleaner
./me_cleaner.py ~/coreboot/3rdparty/blobs/mainboard/lenovo/x220/me.bin
Set options for compilation. These change from rev to rev so play around. I’m using payloads: SeaBIOS, coreinfo, memtest86 and nvramcui (swap fn & ctrl). More info here: https://www.coreboot.org/Payloads
cd ~/coreboot
make nconfig

general
    - [*] Compress ramstage with LZMA
    - [*] Include coreboot .config file into the ROM image
    - [*] Allow use of binary-only repository
mainboard
    -  Mainboard vendor (Lenovo)
    -  Mainboard model (ThinkPad X220)
    -  ROM chip size (8192 KB (8 MB))
    -  (0x100000) Size of CBFS filesystem in ROM
chipset
    - [*] Enable VMX for virtualization
    -  Include CPU microcode in CBFS (Generate from tree)
    -  Flash ROM locking on S3 resume (Don't lock ROM sections on S3 resume)
    - [*] Add Intel descriptor.bin file
      (3rdparty/blobs/mainboard/$(MAINBOARDDIR)/descriptor.bin) Path and filename of the descriptor.bin file
    - [*] Add Intel ME/TXE firmware
      (3rdparty/blobs/mainboard/$(MAINBOARDDIR)/me.bin) Path to management engine firmware
    - [*] Add gigabit ethernet firmware
      (3rdparty/blobs/mainboard/$(MAINBOARDDIR)/gbe.bin) Path to gigabit ethernet firmware
devices
    - [*] Use native graphics initialization
display
    - (nothing checked)
generic drivers
    - [*] Support Intel PCI-e WiFi adapters
    - [*] PS/2 keyboard init
console
    - [*] Squelch AP CPUs from early console.
      [*] Show POST codes on the debug console
system tables
    - [*] Generate SMBIOS tables
payload
    - Add a payload (SeaBIOS)
    - SeaBIOS version (master)
    - (3000) PS/2 keyboard controller initialization timeout (milliseconds)
    - [*] Hardware init during option ROM execution
    - [*] Include generated option rom that implements legacy VGA BIOS compatibility
    - [*] Use LZMA compression for payloads
secondary payloads
    - [*] Load coreinfo as a secondary payload
    - [*] Load Memtest86+ as a secondary payload
    - [*] Load nvramcui as a secondary payload
debugging
    - (nothing checked)
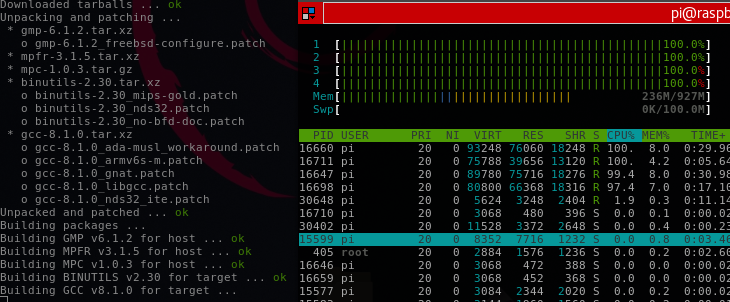
Compile coreboot. This takes around an hour and bombs the CPU & memory.
make crossgcc-i386 CPUS=4 -b
make iasl
make
Now you can flash your new coreboot rom to your chip.
sudo flashrom -p linux_spi:dev=/dev/spidev0.0,spispeed=512 -w ~/coreboot/build/coreboot.rom
Poweroff, disconnect the pi, reattach the keyboard and palm rest cables and boot her up. If all went well, you’ve got yourself a pretty nice little libre laptop.
If you need to change any bios options, you’ll have to go back a few steps and recompile/flash the bios.
Take back your freedom!


0 Comments